Creating a Self-Registration links allows large groups of clients to sign themselves up for Sandler Online and new products.
Step 1. Log in to Sandler Online at learn.sandler.com. Go to Sandler Online Administration
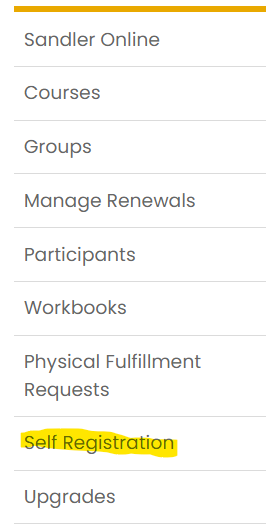
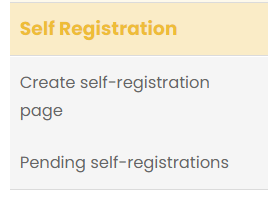
Step 2. On the left hand side of the page, select Self Registration. Select the Create self-registration page link.
Step 3. Complete fields.
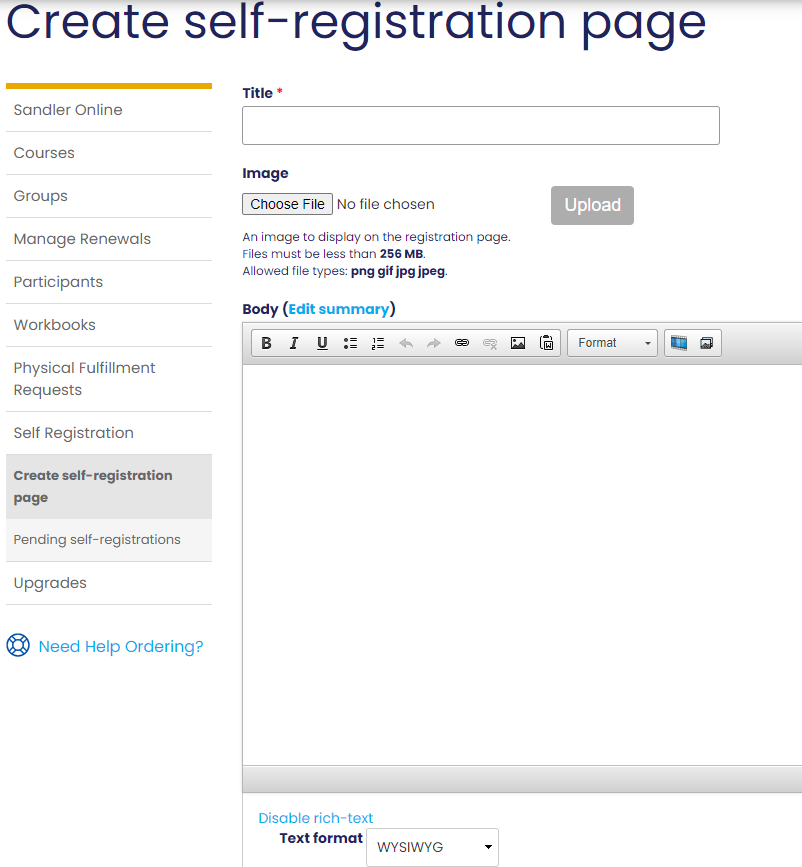
- Title - Add text to communicate this is a link to register.
- Image - Here you can upload images such as your company logo.
- Body - Any information you want the user to know regarding registration and tasks needed to complete.
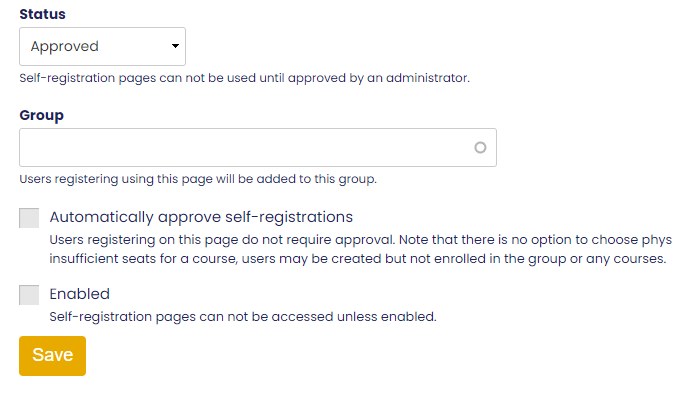
- Status - Pending Approval, Approved, Rejected. Note: Self-registration pages can not be used until approved by an administrator.
- Group - Users registering using this page will be added to this group. Note: Must enter Group Name exactly as it appears in your Groups
- Automatically approve self-registrations - Users registering on this page do not require approval.
- Enabled - Self-registration pages can not be accessed unless enabled.
Step 4. Once complete, select Save button. A pop up message will appear stating "Saved self-registration page." You should now be able to see Self-registration link just created.


You can edit or duplicate the self-registration link from here. Alternatively, you can select Self-registration then select Pending self-registration to view all pending self-registration links and to edit or duplicate as needed.
For more help, please see Creating a Self-Registration Link for Groups
Comments
0 comments
Please sign in to leave a comment.